
While using the google sheets, you may forget to add some columns of important data. Columns can be fixed on the left side of an existing column. The data on the existing column is pushed to the next column and now the new black column exists so as to help you make the necessary changes and data insertion. The following are the steps to add columns in google sheets. Windows chrome google sheet page screenshots are captured to help you navigate easily.
Steps to add columns in Google Sheets
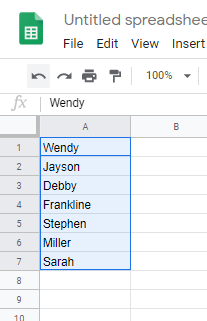
1. The capture below shows data that has been created. This data needs to be in column B and a new column is needed in column A so as to add some data. Highlight the column that should fall after the new column as shown below. To highlight the column you can use shift and the arrows so as to highlight the number of columns that you need. If you highlight several columns it means that the same number of columns will be inserted in the space before the highlighted columns.
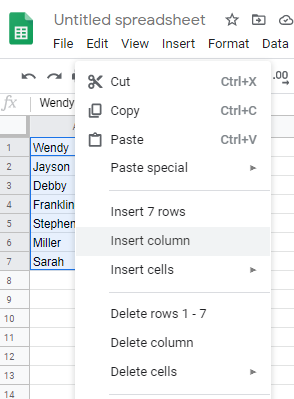
2. While the column is highlighted, right-click so that options are displayed. The options allow you to select the intended action with the document. Therefore, we go for the insert column option that will help us add columns to the google sheet.
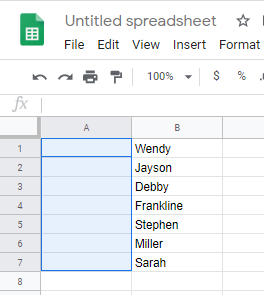
3. When you click the insert a column, column A is left blank and column B is filled with information that was once in column A. This sample shows the addition of one column on the left side of the highlighted column. If you highlight two columns there will appear two blank columns.
While planning to add columns on google sheets ensure that you highlight data on the right side of the new column. The new column always displays on the left side of the highlighted column. Therefore you need to plan on the new column position before making the right click on the highlighted data.