Google sheets is an online spreadsheet application that allows one to key in data and analyzes just like in Microsoft excel. Its advantage is that your data is automatically saved in google drive hence no risk of losing data even when the power goes off. Besides, it has more simplified formulas to do calculations and perform other activities. Furthermore, one can invite others to work on the spreadsheet with you. Also, it allows you to make changes to the file without having to destroy the original document. When you are done making changes, you can simply download it where sheets are going to convert it back to excel files, ready to be used by Microsoft excel once again.
For those who might have been used to Microsoft excel where you only need to select data to be included in the table then click “CTRL+T” for Windows and “Apple +T” for MAC, or the Format as Table option in Excel standard toolbar, must find it challenging to insert Table in Google sheets since there is no direct option for Tables.
I will explain some simple steps to add a table in your google sheets data using Pivot Tables method.
Step 1
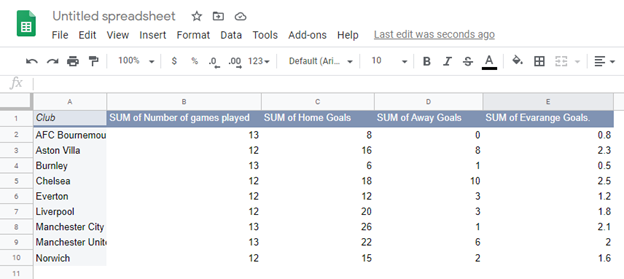
First, select the data you need to be included in the table.
Step 2
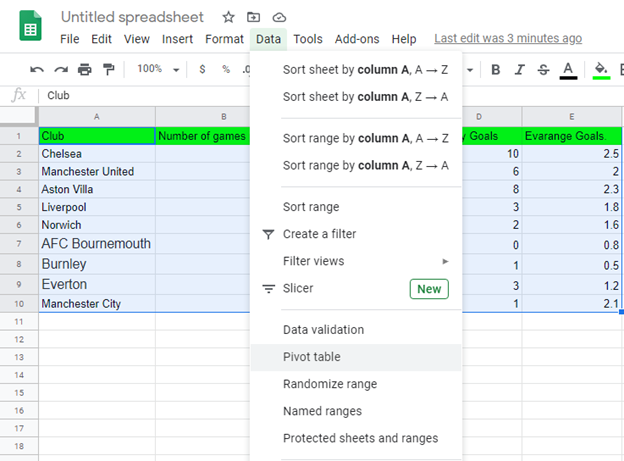
In the menu at the top, click ‘Data’ then select ‘Pivot Table’.
Step 3
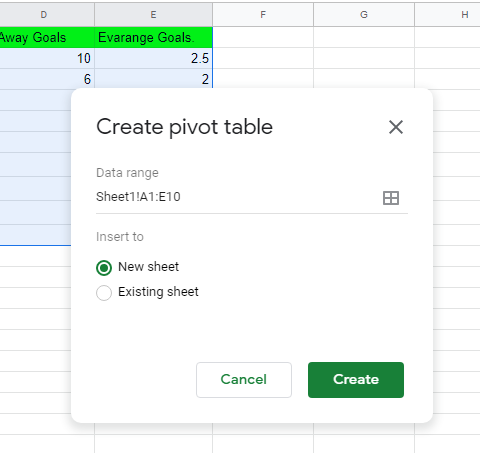
Click create on the pop-up window that appears once you click on the ‘Pivot table’.
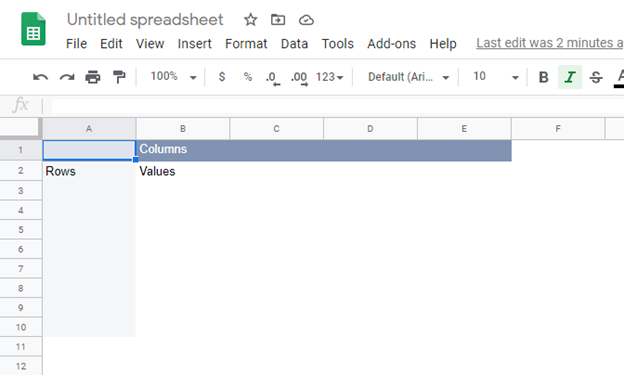
A new sheet opens up at the bottom of the screen as shown.
Step 4
Use the Pivot table editor window which pops up at the right side of the screen to edit your table.
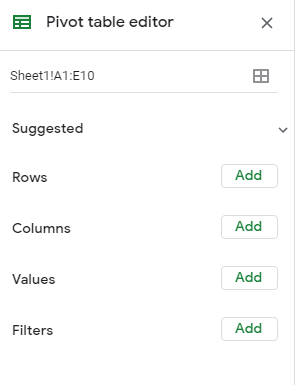
Step 5
Click on rows and select what is to appear on the rows, Click on add Columns then choose what is to appear on the columns. Your table is created as per your editing desires.